Quick Start Guide
On this page we'll guide you through the 5 key steps to the core workflow on the Dashboard. Our plan is to:
- Create an inventory item
- Create a production account for your customer and add the buyer and billing contacts
- Add the inventory item to an order
- Create an invoice for that order
- Receive a payment against that invoice
Details and advanced concepts will be discussed later in separate articles.
Log into your Dashboard
Log in at https://dash.propcart.com/login
Your Dashboard login credentials are the same email and password used to log into the Propcart Marketplace and your Propcart Pro Webstore.
Forgot your password? Send yourself a password reset email. Your password-reset link will expire in 30 minutes.
Didn't receive your password reset email? Check your spam folder. Then whitelist all emails from "@propcart.com"
Add the Dashboard to your browser's Bookmarks for easy access. For Mac, press Command + D. For Windows, press Control + D.
Verify your account settings
Add your logo and bio to your Profile Settings. You can copy your avatar and bio from your prop house's Instagram or Facebook account.
Verify your Address Settings and Profile Settings. This information will appear on:
- every inventory item
- all sales and billing paperwork and emails
- your Propcart Marketplace store
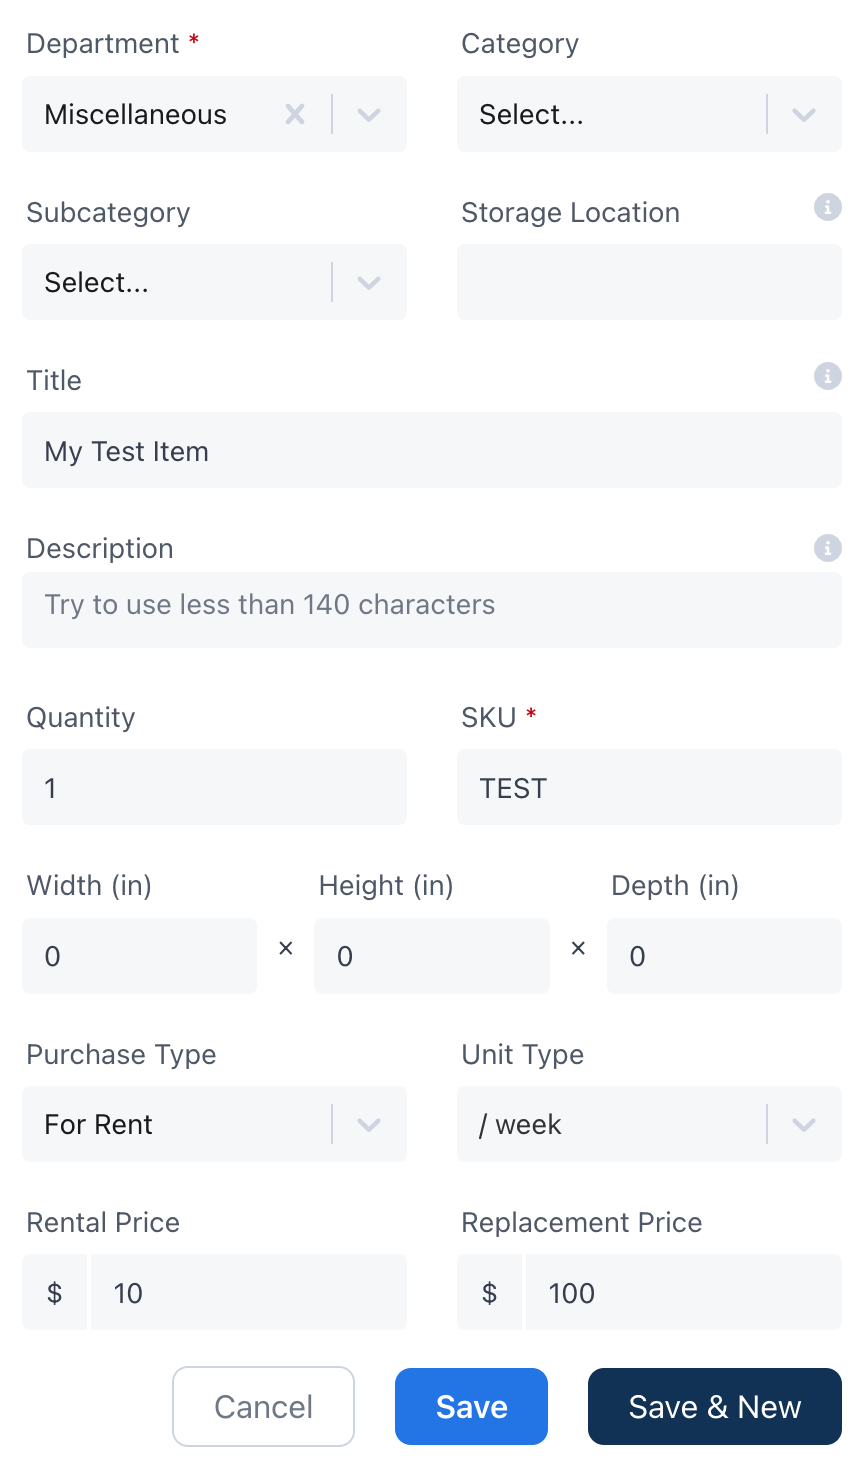
Create an Inventory Item
Create a new inventory item
Add the following information and Save:
Photo: Download test imageDepartment: MiscellaneousTitle: My Test ItemSKU: TESTRental Price: $10
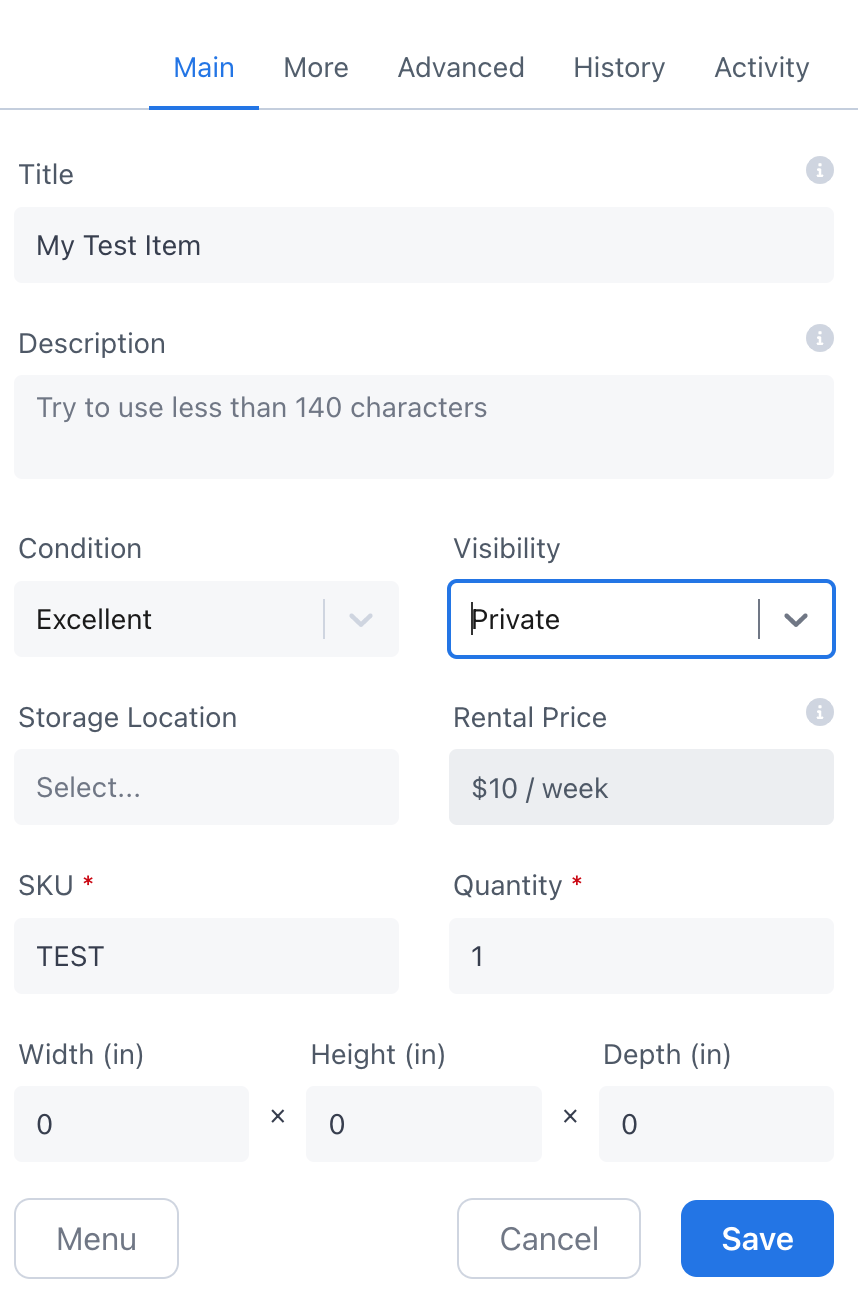
- In the resulting item detail modal, verify the
Visibilityis Public.

New items are automatically converted from "Private" to "Public" visibility if they have a photo and it successfully uploads.
View your inventory item on your Propcart store.
Remove this inventory item from your Propcart store by changing the
Visibilityto "Private" and Save.
You can learn more about inventory items in Dashboard > Inventory > Items.
Create a Production
A Production is the entity that signs your rental agreement, provides the certificate of insurance, and pays your Invoice. Sometimes this is the production company for small commercial jobs and events. Other times this is the film or TV show. It's up to you to decide how you want to organize this. We discuss this in more depth in Dashboard > Sales > Productions.
You might refer to a production as an "account" or "customer" in other software systems.
Create a new production with the
Production Name"My Test Production".Save the new production.
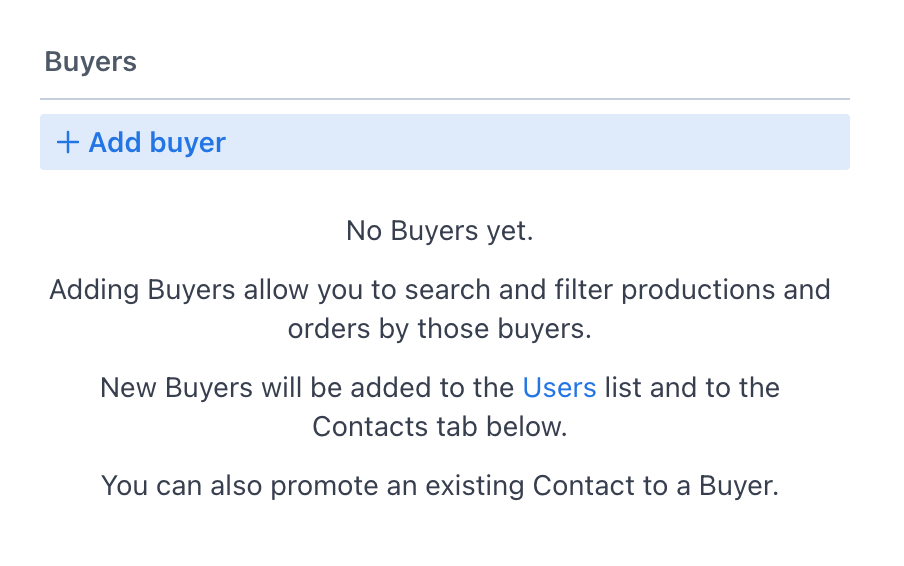
On the resulting production detail page, click Edit and then click Add buyer in the top right:
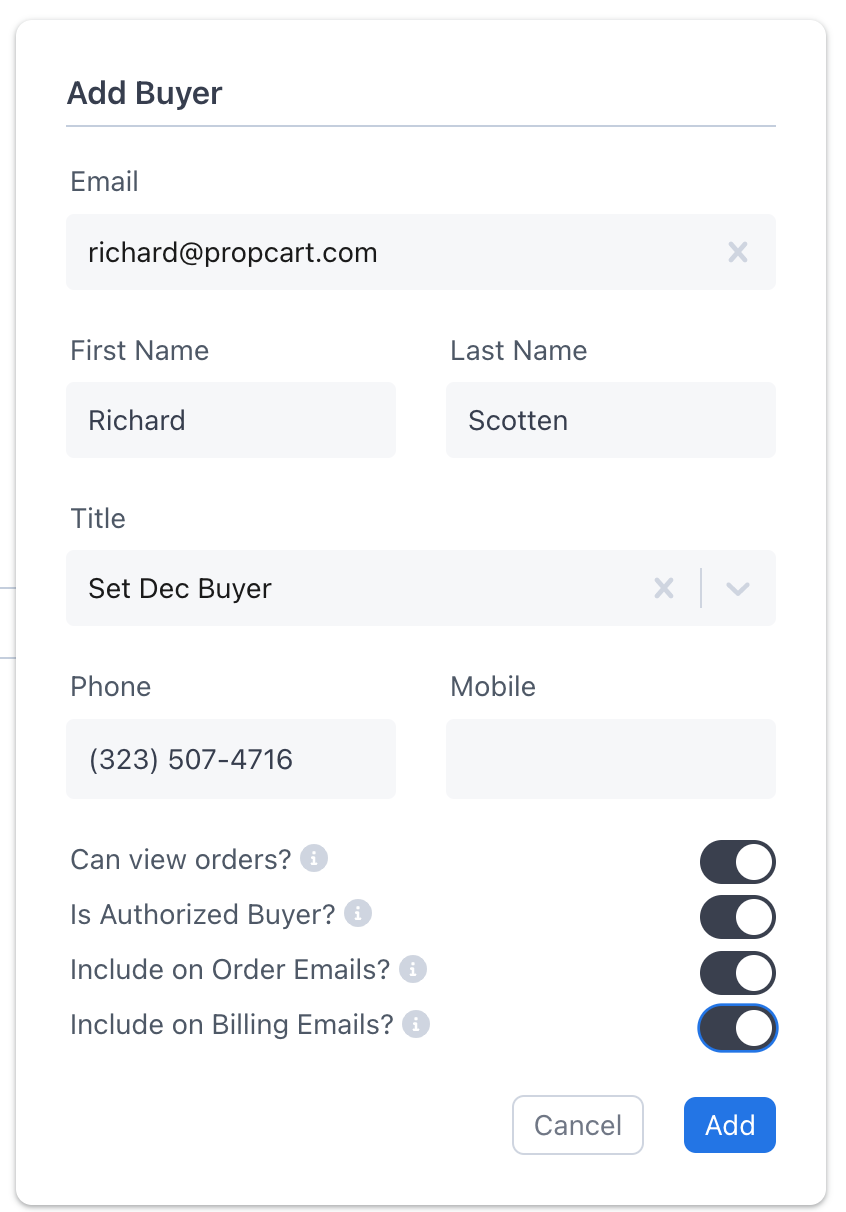
- Add yourself as a buyer and DO NOT use your sales email. Enable all toggles.
Do not use your sales email when sending yourself test emails from the Dashboard. Your sales email is already CC'ed on all Dashboard emails.
You can learn more about productions in Dashboard > Sales > Productions.
Create an Order
In Propcart, an order contains different statuses that indicates where it is in its lifecycle.
"Sales & Rentals" type orders start off as a Quote then move to a contracted order and finally to a Returned order.
In this section, we're going to create a "Sales & Rentals" type order with one rental item and step through each status in the order's lifecycle.
Create a new order.
Add the following information to the form:
- Add "My Test Order" as the
Order Title - Select "My Test Production" as the
Production - Verify your email appears in the
Buyer Emailsfield
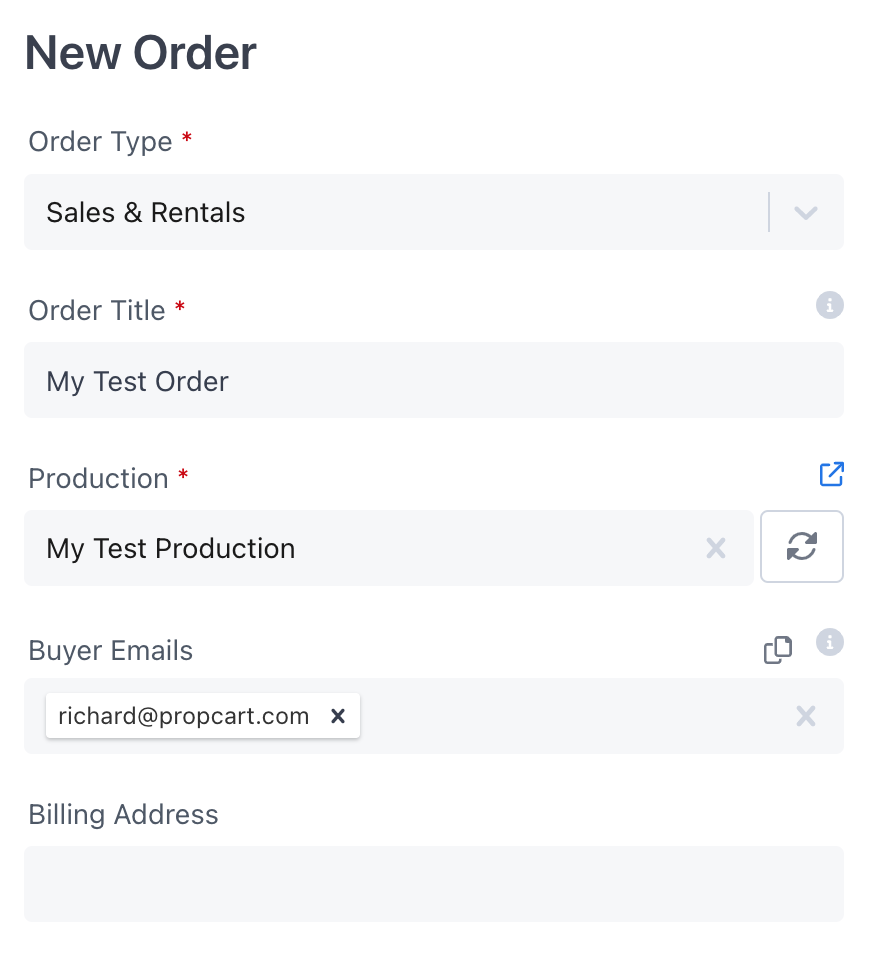
Leave the rest of the order form alone with its default values. Click Save.
On the resulting order detail page, type "My Test Item" into the
Add Item to Orderinput box. Press the "Enter" or "Return" key to select the item and add it to the order.
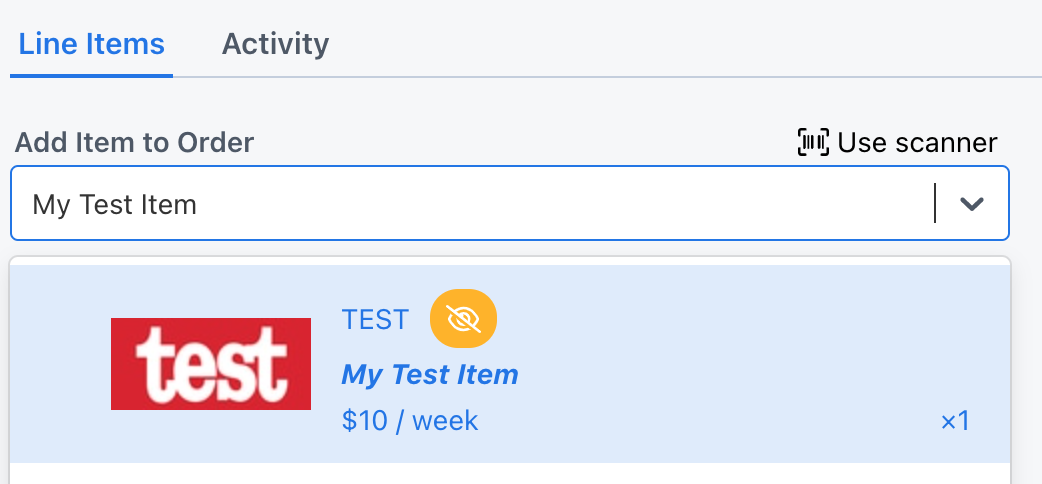
An item added to an order is called a "Line Item". Our test order will only have one line item with a quantity of 1 that is a rental item (not a for sale item).
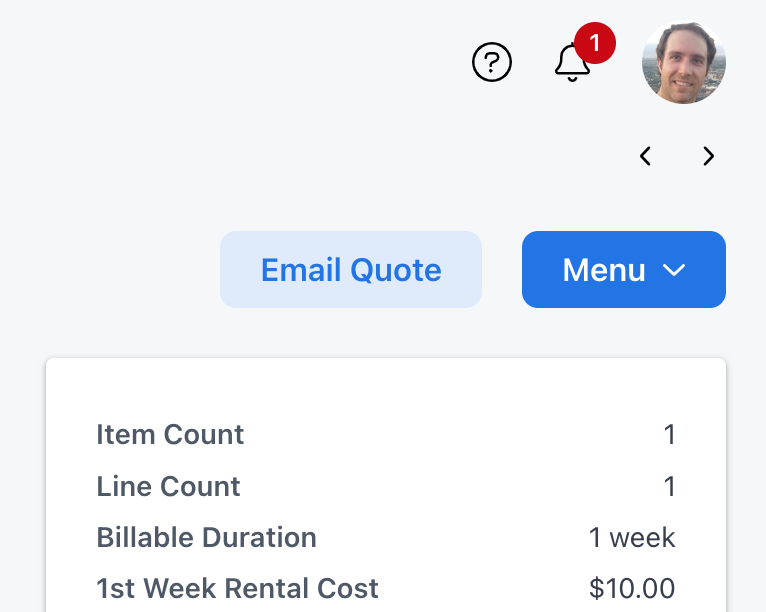
Email the buyer (yourself) a quote by scrolling to the top of the page and clicking the light blue Email Quote button, then Send. When prompted, update the order to "On Hold" status.
Check your email to find the Quote and PDF attachment. Notice that your sales email is CC'ed and is also the "reply-to" email, which is the case for all sales emails sent by the Dashboard.
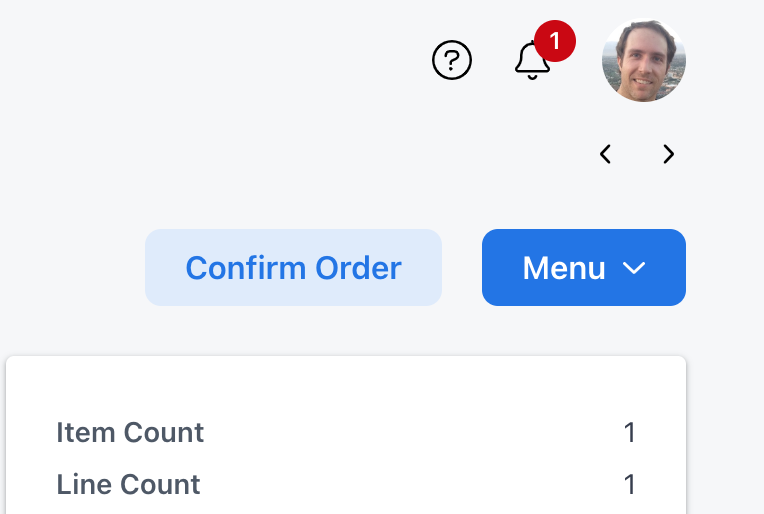
Imagine the buyer calls and tells you the quote is confirmed. Return to the order on the Dashboard and, in the same location, click the light blue Confirm Order button.
If you're prompted to "Notify Dispatch", you may click Cancel.
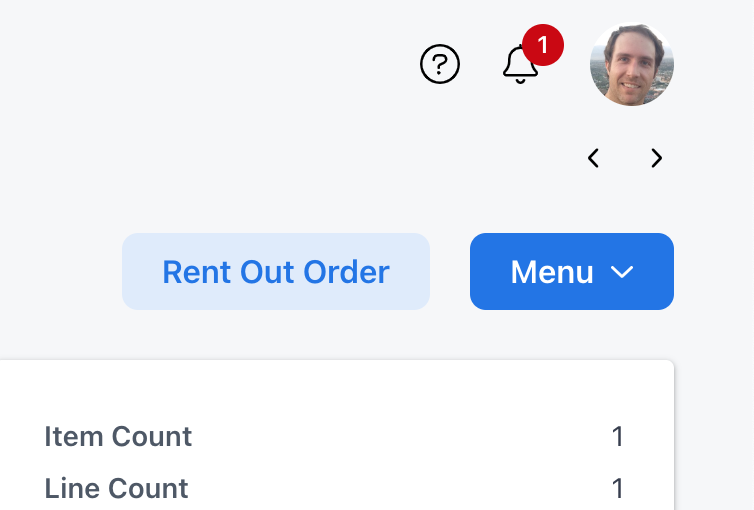
Now imagine you've picked and packaged "My Test Item" and the customer picks it up. Click the light blue Rent Out Order button.
If you're prompted to "Email Checkout Sheet?", click Open Emailer then Send to send the buyer (yourself) the Checkout Sheet.
Check your email to find the Checkout Sheet and PDF attachment.
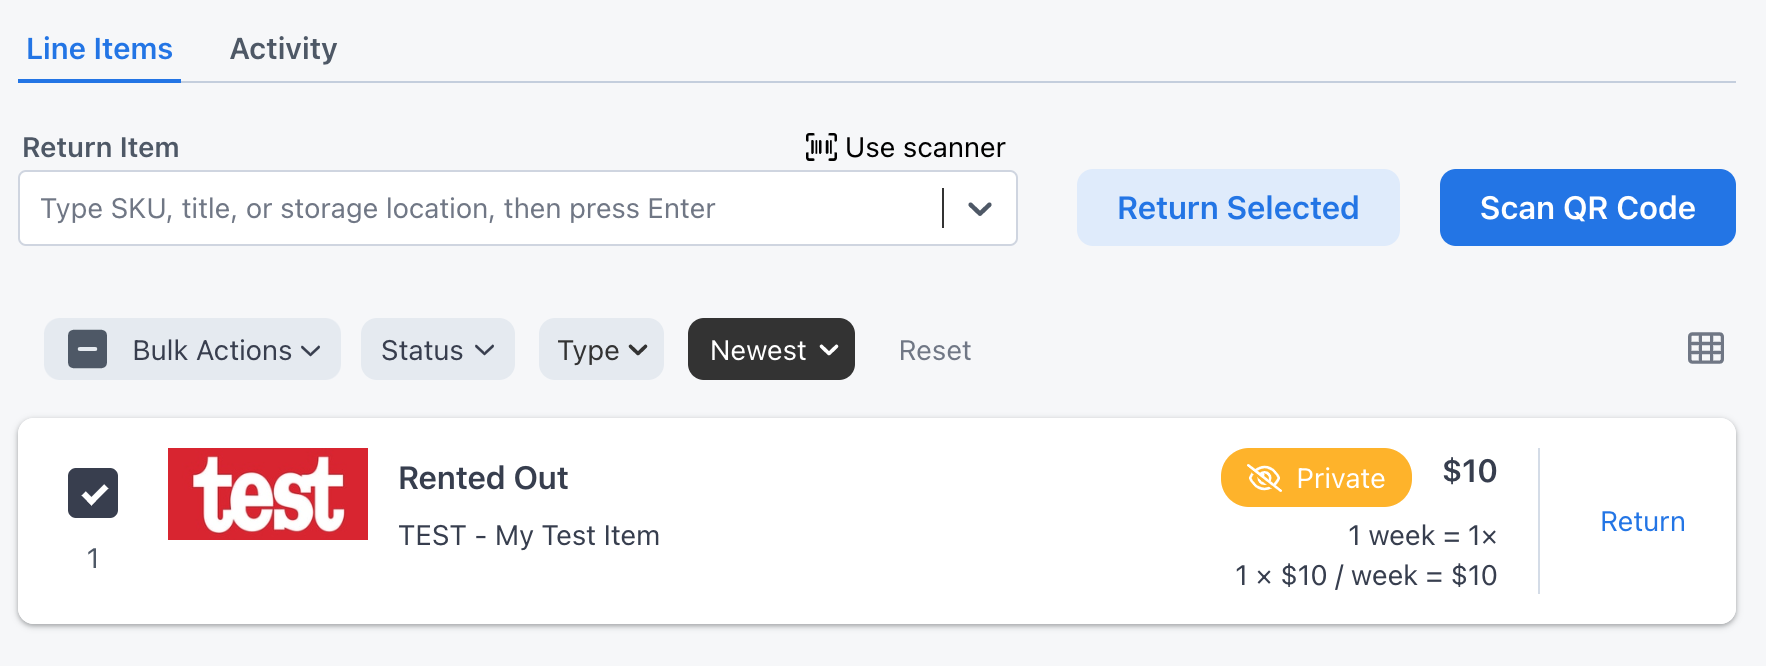
- Now imagine a week goes by and the customer returns "My Test Item" on time with no damage. Check the line item checkbox and click the light blue Return Selected button.
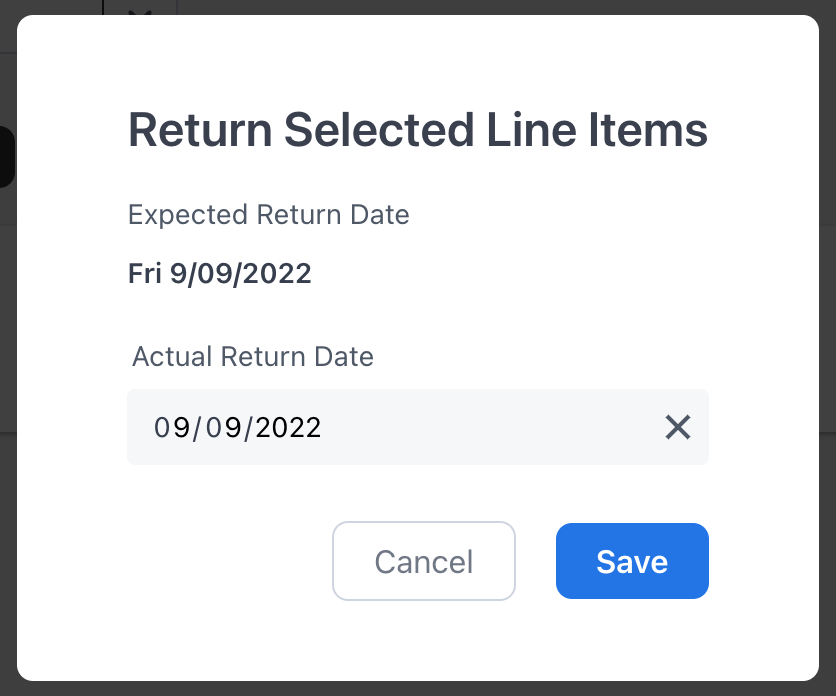
- When prompted, select the expected return date as the
Actual Return Dateand Save:
Notice the line item and the order both show they're in "Returned" status.
You can learn more about orders in Dashboard > Sales > Orders.
Create an Invoice
At some point in the order's lifecycle you'll want to invoice the customer and/or collect payment. Depending on the customer and the payment terms (e.g. COD or Net 30), you might want to invoice the customer when the order is Confirmed or Rented Out.
In Propcart, orders and invoices are different documents. Some users are accustomed to them being the same document like in Quickbooks, but Quickbooks was not designed for rentals and the various states of a rental order's lifecycle.
Furthermore, separating orders and invoices affords us the flexibility to attach multiple orders to one invoice. We'll discuss this in more detail in Dashboard > Billing > Invoices > Creating an Invoice.
- Return to your order and click on the Billing tab at the top of the order form.
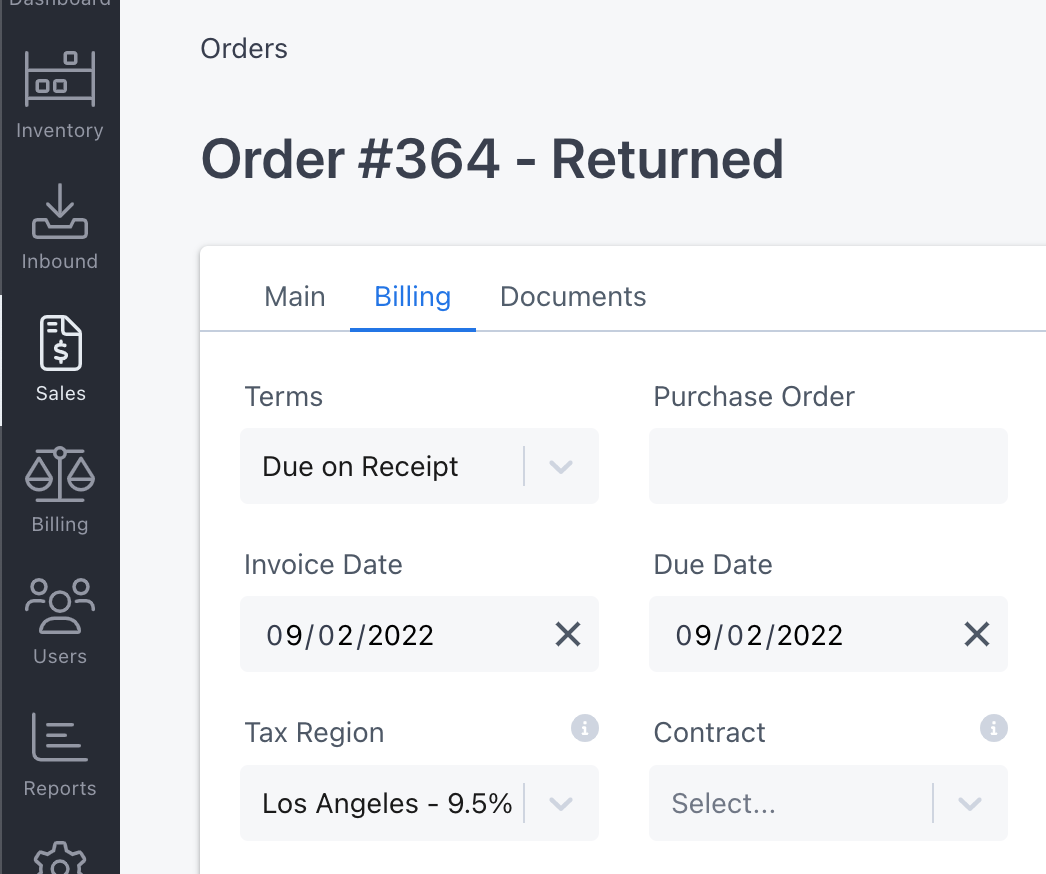
- Add the following information to the Billing form:
Terms: Due on ReceiptInvoice Date: Today's dateTax Region: This should default to your tax region in your Production Settings
Click the light blue Create Invoice button below the form.
When prompted, read the alert then click the red Create Invoice button.
When prompted, click the red Go to Invoice button and you'll be redirect to the new invoice page.
Notice the Billing Emails on the invoice form are already filled out for you. The Billing Emails are populated with all production contacts that have the Include on Billing Emails? toggle enabled, which we did above in Create a Production > Step 5.
Also notice our order is a "line" on this invoice. You can add multiple orders to an invoice, but our test invoice will only have one order.
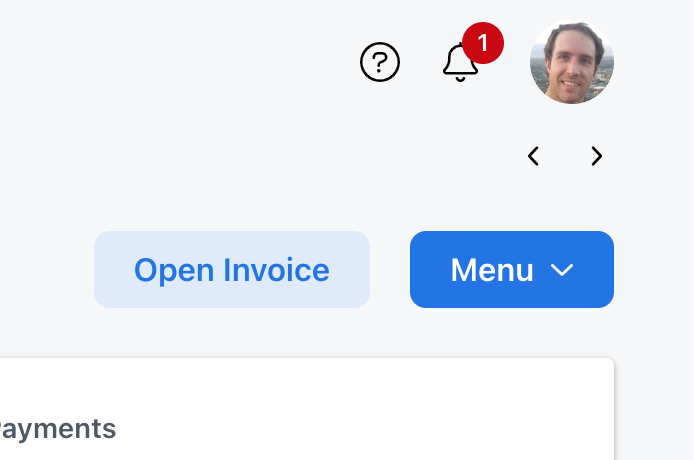
- At the top right of the page, click the light blue Open Invoice button.
When prompted, click the red Open Mailer button then click the blue Send button to email the billing contact(s) (yourself) the invoice.
Find the invoice email in your inbox and review.
You can learn more about invoices in Dashboard > Billing > Invoices.
Receive a Payment
Propcart offers two general ways you can receive a payment:
- Receive a payment manually
- Receive a payment via Stripe
We recommend you set up our Stripe integration so your customers can pay invoices via credit card and ACH.
Receive a payment manually
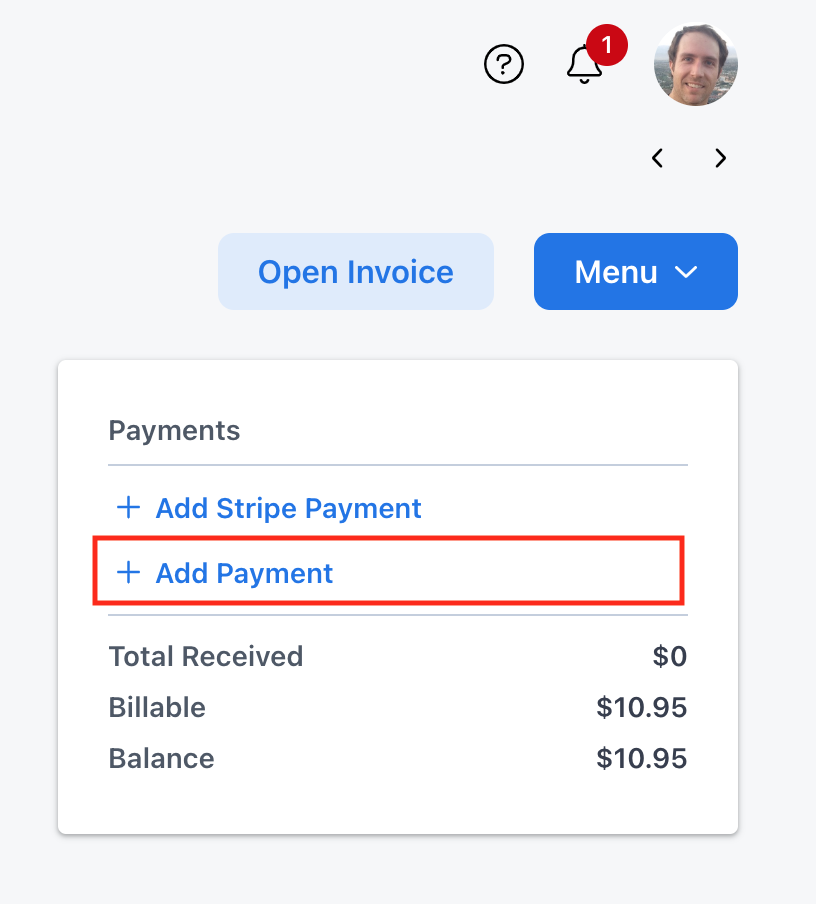
Go to your test invoice you just created, and find the "Payments" box on the top left.
Click Add Payment.
- We'll make this a check payment, so enter the following info:
Method: CheckTransaction #: Enter any fake check number
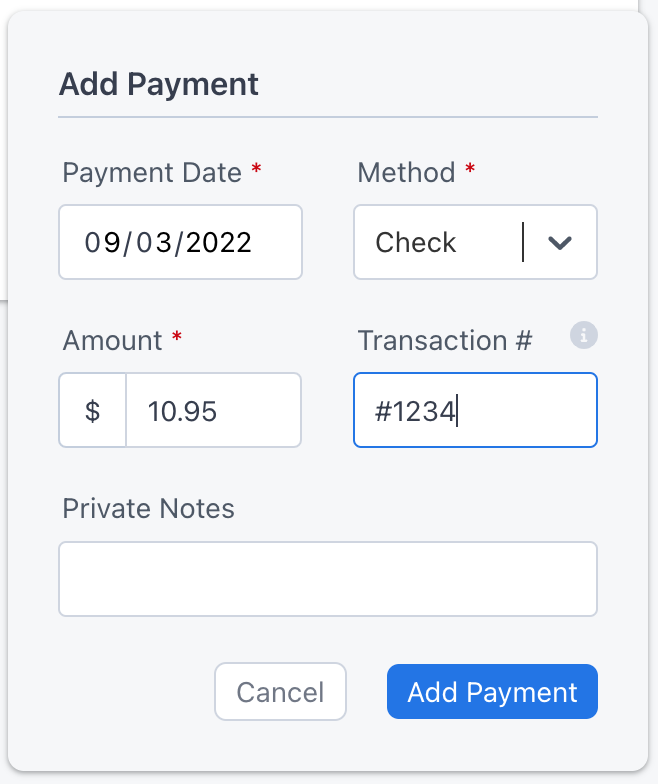
- Click Add Payment to save.
Receive a payment via Stripe
Propcart partners with Stripe for credit card and ACH payments processing. They charge 2.9% + $0.30 per transaction.
To receive payments via Stripe:
Set up your Stripe account via our Stripe Integration. The process is easy and takes about 5-10 minutes. You'll need your bank account numbers and EIN or social security number.
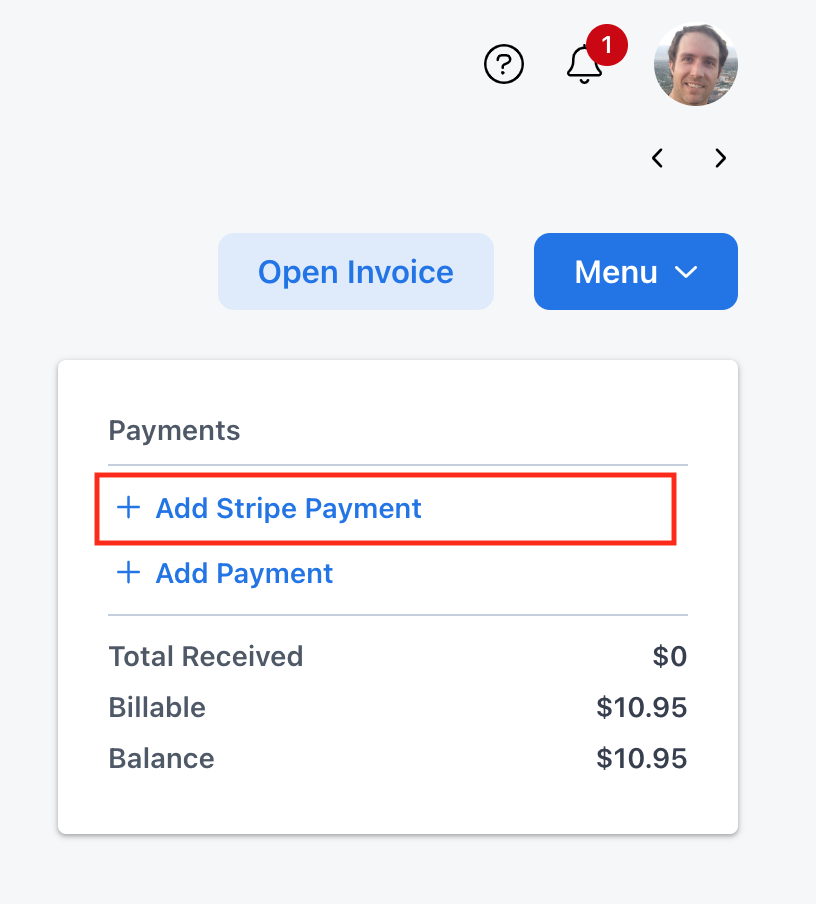
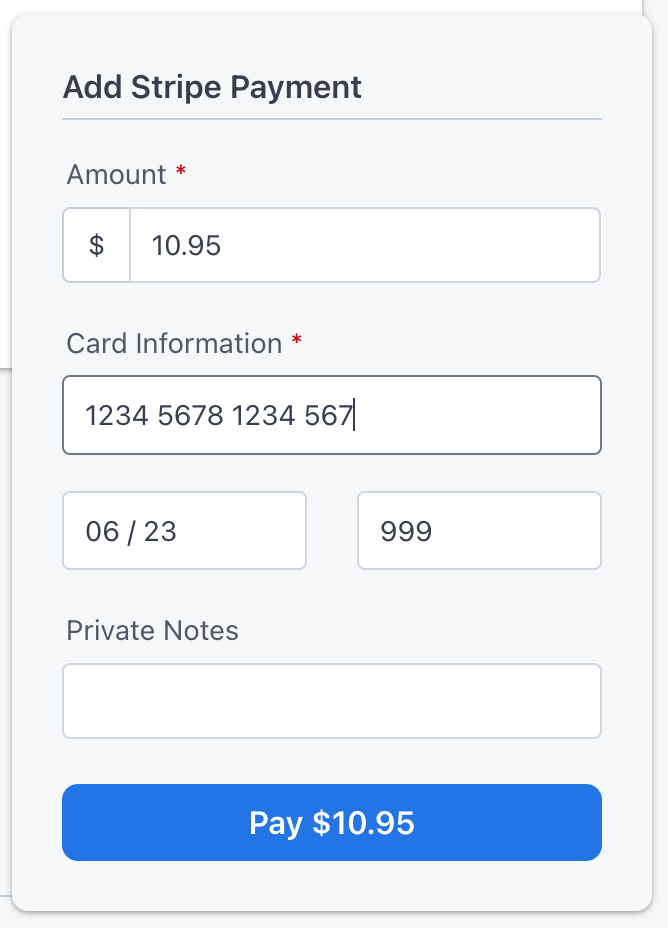
After Stripe is enabled, return to your test invoice and click Add Stripe Payment.
- Fill out the form with the customer's credit card info then click the Pay $10.95 button.
You can learn more about receiving payments in Dashboard > Billing > Invoices > Payments.
Congratulations!
You have just learned the fundamentals of Propcart.
Anything unclear or buggy in this tutorial? Please report it!
Get a deeper understanding of the Dashboard here.